February 28, 2025
Automating PDF Creation and Metadata Tagging
A common client request is generating PDFs from Power Platform data. While many tutorials explain how to create PDFs using Power Automate, this post focuses on saving and tagging these documents in the SharePoint Library set up in Part 1.
Assuming you already have a Power Automate flow that generates a PDF from a Microsoft Word template, the next step is to save the document in SharePoint. Most guides stop at saving the file, but this approach misses the opportunity to enhance usability by adding metadata for efficient searching and filtering. Metadata—descriptive tags about data—makes records easier to locate.
To add metadata to SharePoint documents:
- Use the "Get file content" action to retrieve the document’s data for the dataURI column using this expression:
datauri(base64ToBinary(body('Get_file_content')?['$content']))
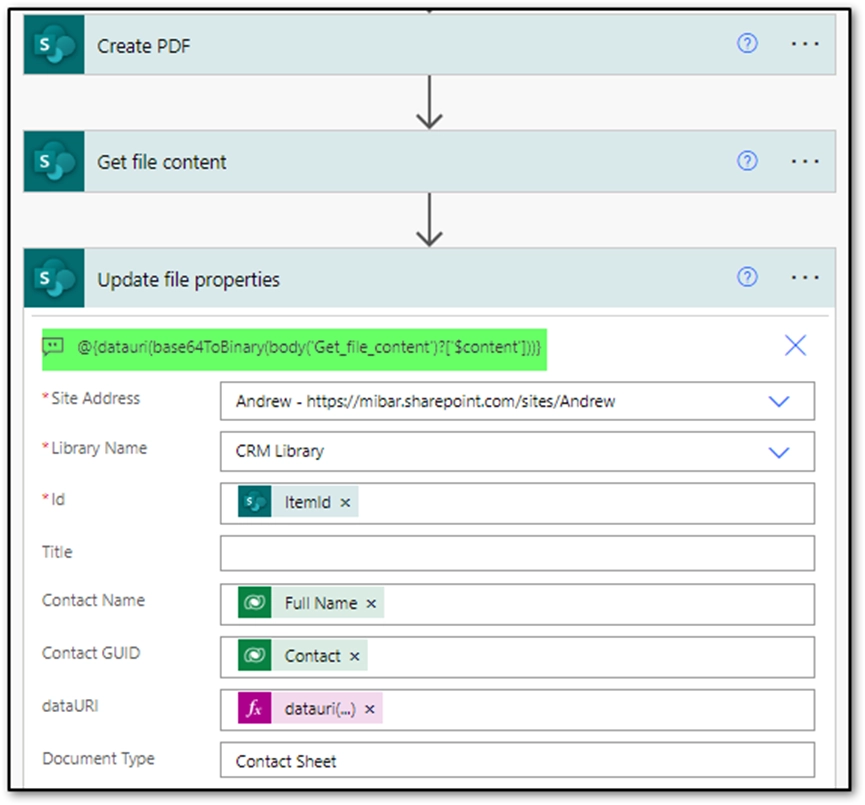
- Use the "Update file properties" action to populate additional SharePoint columns. For example, use dynamic content to add a Contact GUID and other relevant metadata.

With this approach, the newly generated document becomes easily searchable by users or automated processes.
Copying Files from CRM to SharePoint
In addition to generating PDFs, businesses often need to save external documents, such as medical clearance PDFs, to a CRM record. This process ensures that these documents are accessible to users and properly tagged for easy retrieval.
Flow Example: Uploading a Medical Clearance Document
- Trigger Condition: Check that the document field in the CRM has been updated and is not null.
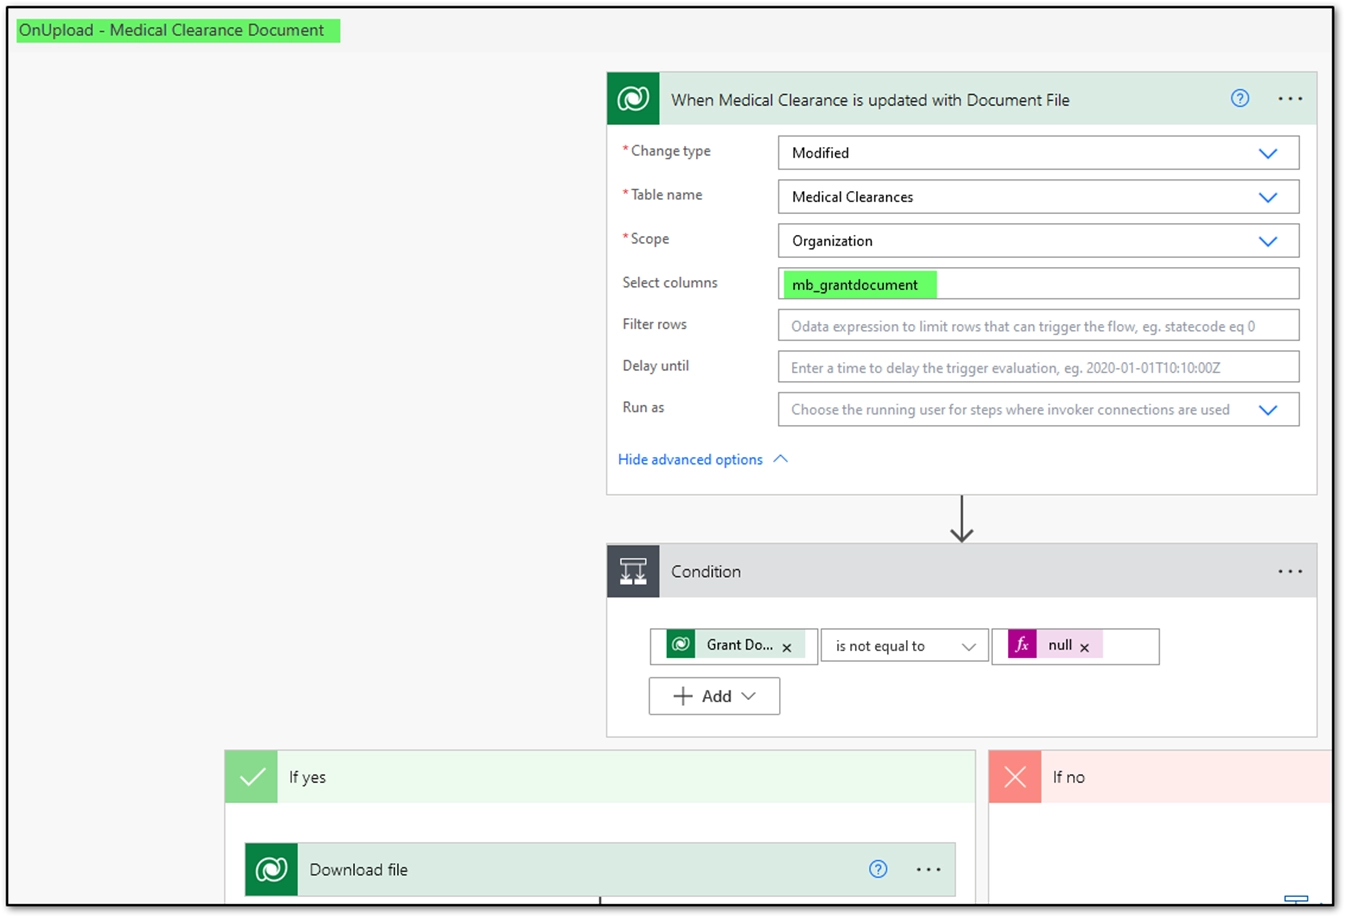
- Download File: Use the Dataverse action "Download file" to retrieve the file and save it to the SharePoint Library.
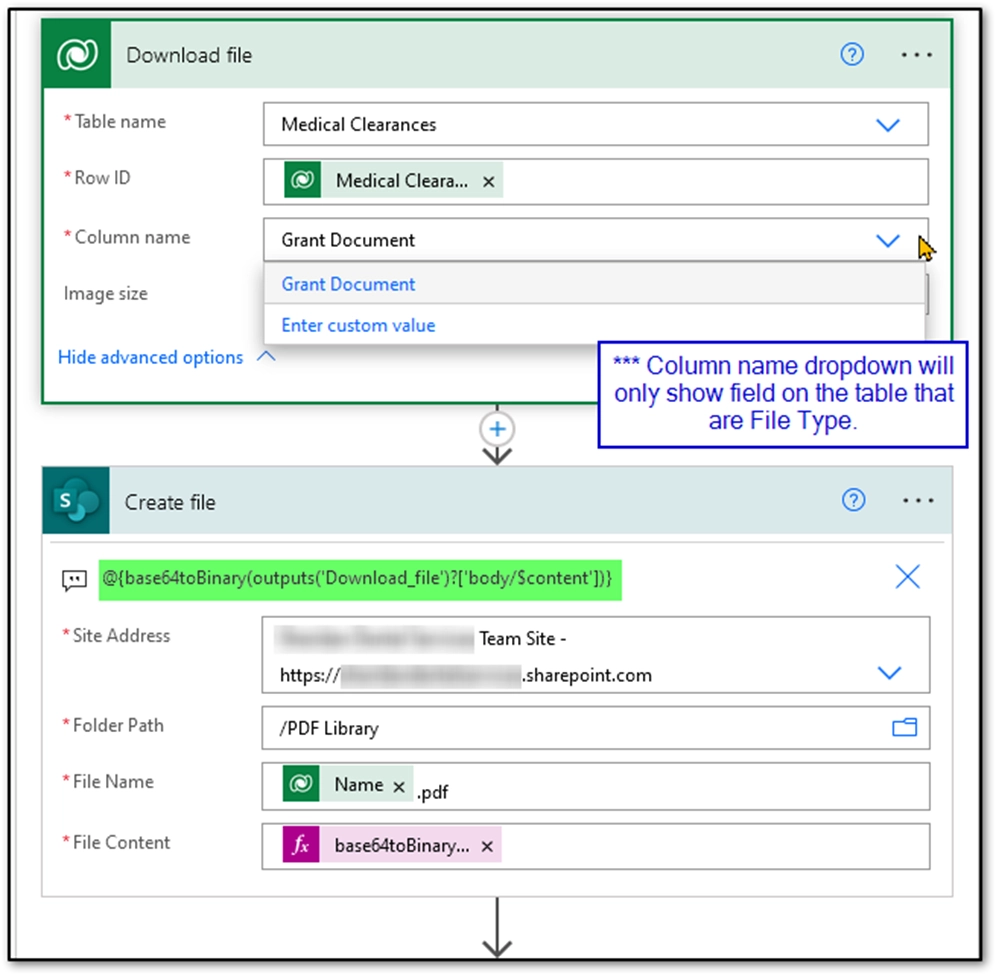
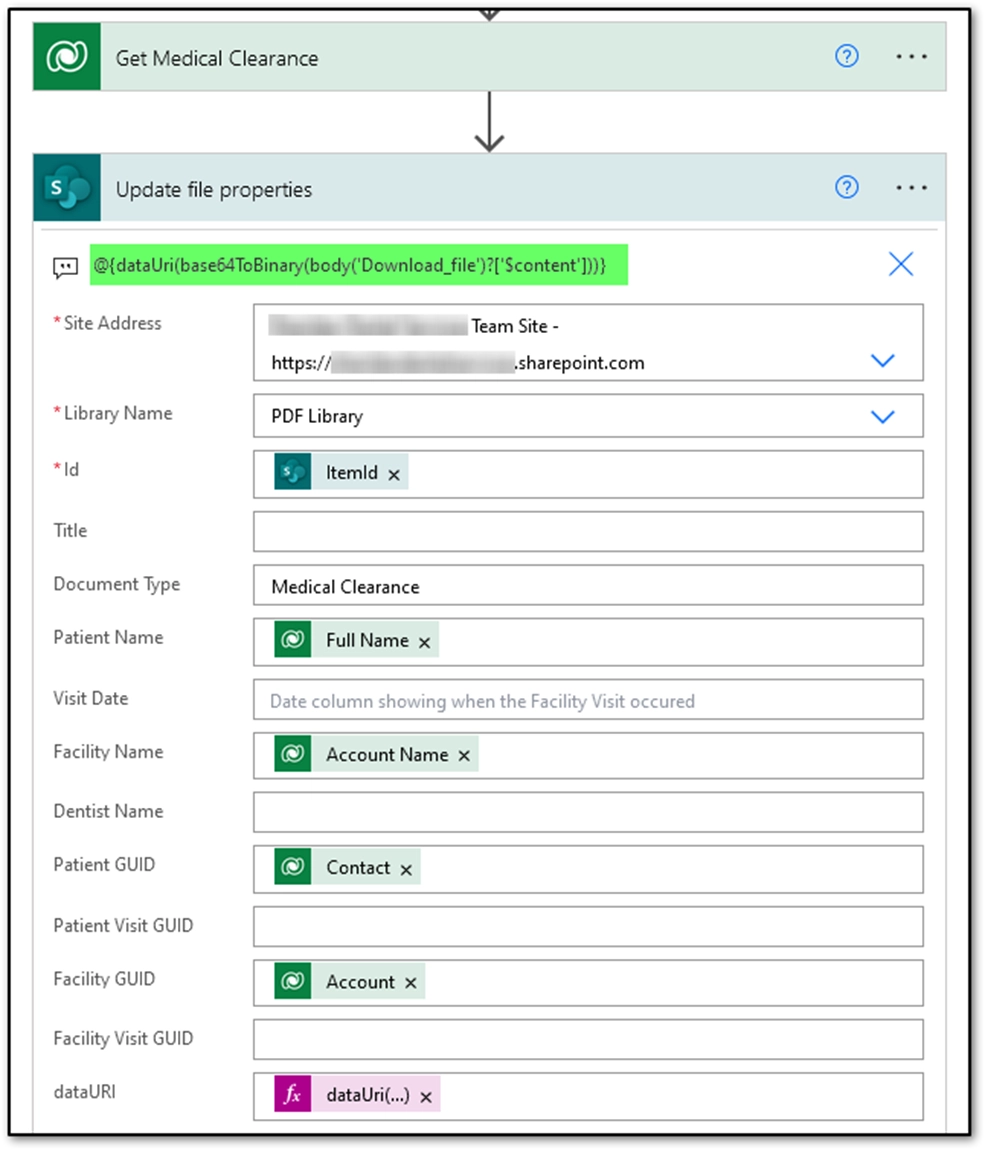
- Add Metadata: Retrieve related CRM record data and use the "Update file properties" action to tag the file with metadata, such as patient name, facility, and associated records.
By combining automated document handling with metadata tagging, organizations can create a streamlined, searchable, and organized document management system in SharePoint. Part 3 of this series will provide a walkthrough of the process of creating a Command Ribbon Button in a Model-Driven App. For questions, reach out to your Citrin Cooperman advisor or Andrew Yoder at sales@citrincooperman.com.
Other articles in this series include:
Related Insights
All InsightsOur specialists are here to help.
Get in touch with a specialist in your industry today.